Tuesday, October 28, 2014

Maleficent Costume - and horn mini-tutorial


If you follow me on Instagram then you have probably seen some sneak peeks of this. AND you probably know how thankful I am that I have one of the ONLY little girls I know that did not ask to be Elsa! (thankgodness). In a "frozen-everything" type of household,  I was waiting, waiting, afraid to ask the question "what do you want to be for Halloween". But I finally got up the courage to ask, cringed while I waited for the answer.......and by some unusual higher power I got a truly great answer...

MALEFICENT!!!!
 (I think it had something to do with the fact we just say the movie a few days earlier rather than a growing tired of frozen.....but I'll take it!)

Yay! something I would not dread working on! Something without all that dreaded tulle,glitter, crystals and nightmarish fabric! 
So this was the Inspiration pic we found


 And here is the final result
 (Most of my kids clothes week has been spent on this beauty)


Nearly all the supplies cam from fabric.com. I started by making a extra long turtleneck dress for underneath, using a self drafted pattern and black cotton jersey

The cape was made from a stretch velvet and lined with a purple stretch satin. I used a super heavyweight interfacing for the collar and lined the sleeves and hem with a faux fur. The cape is also self drafted.


The headpiece was the labor of love, and I realize now that I made the horns a little on the big size (since I made this when she was at school, so no way to test the scale, and once it was made there was no changn' it)
I had planned on making a full tutorial - but forgot to take a lot of pictures, so here is sort of a mini-tut of what I did:


I started out with two blocks of floral foam from the dollar store

I started carving away with a chisel, really roughly at first and then using xacto knife made it much smoother. I just free handed it (that is why both horns don't match :) ) ***Warning - this is incredibly messy, I would say do this step outside or have a vacuum near by to clean up as you go***


Once I was happy with the horns I took some stretch faux leather (also from fabric.com) and cut it into strips and starting wrapping away. I started off with a pin to hold it is place and wrapped tightly around the each horn, using a gluegun every few inches to keep in all together.


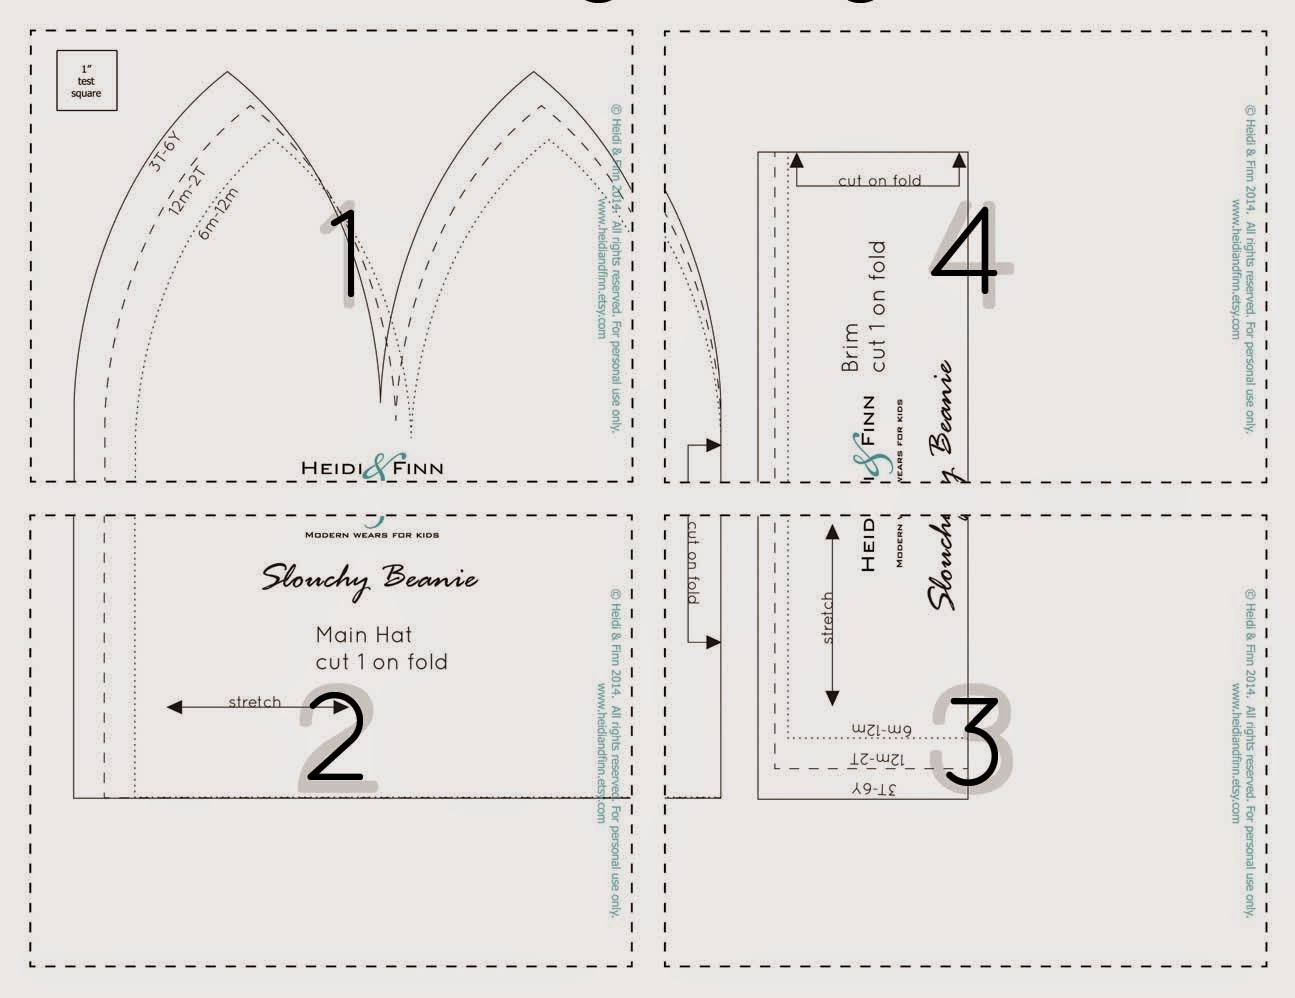
I made the base of the hat by modifying  this pattern  from tye dye diva. Really the only change was cutting the front  with a pointed middle rather then straight across.
I made two smallish star shaped cuts on either side of the hat and pushed the horn through.


(I stopped taking pictures for the final part sorry!) I hand sewed the horn to the hat, slowly connecting the material near the bottom of the horn with the hat. I finished it off my gluing a few strips around the base of the horns to hide the stitching (which is impossible to look neat when sewing faux leather!) I also added a liner to the top section of the hat to cover the exposed bottom of the horns, otherwise the foam kept leaving bits in her hair.
I added a snap to the bottom chin strap and Done!


This is one of the first costumes that I have made FULLY - I usually end up buying most of it :0
I am pretty happy with how it turned out...and I think she likes it! .....actually HER favorite part is the red lipstick...but that is a 6 year old :)


What are you making for Halloween? 

~Christine 


Friday, October 24, 2014

Kids Clothes Week - Outfit #2 bubble dress


So there was not a ton I was able to share for Kids clothes week - but here is one of them. You may have noticed that I am working hard on updating and expanding all the sizes on older patterns (lots and lots of you ask! :) )

So the next pattern up is the Bubble Dress - one of my first patterns and also one of the most requested in bigger sizes. I have made about 6 different versions this week, but only managed to get this one photographed so far :)


Once again I chose a fabric that is hard to photograph. This is a really soft mid-weight Marimekko satine. It has beautiful drape and the most beautiful sheen (hence, hard to photograph)


It is actually a much deeper red in person with burgundy and wine circles, the purple is actually a deep eggplant color. seriously great stuff and a dream to sew with. I am pretty sure this will end up as one of my daughters holiday dresses this year.


I have this pattern drafted up to size 12y and the pattern will be ready for testing next week, so make sure to follow our facebook page to sign up

~Christine


Thursday, October 23, 2014

Slouchy Beanie hat - FREE pattern for kids clothes week


Project 2 for kids clothes week - HATS! more specifically oh so cool slouchy beanies! Somehow my kids seem to lose about 10 hats each fall/winter season, and we are scrambling in late February to find something that fits...so this year I wanted to be prepared.


This is a great project for all those small pieces of fabric you have left from other projects that you don't know what to do with. Also perfect for up cycling old knit clothing.


 It requires around 1/4 yard of fabric AND (the best part) take about 15 min to sew! no joke, faster on a serger too!


What you need:
  • 1/4 yard or so of pretty much any knit fabric that has some stretch to it (jersey, french terry, sweater knit, fleece, sweat-shirting, stretch wool etc.)
  • download the pattern here, and cut out the size you are making **Note the sizes are only approximate, you may need to make a different size according to what material you are using and your child's head, for reference my oldest is wearing the 3-6y size (she is sz7 store bought) and my youngest is wearing the 12m-2t (she is sz3 store bought)
https://drive.google.com/file/d/0B_8Gt0xYcWccdUhmS0Z6LUV4bDg/view?usp=sharing

How to:
Cut your 2 hat pieces (main hat and brim)


fold the main hat in half and sew the sides (tapering your stitches along the folded edge). Seam allowances are 1/2", but for a more slouchy look, or if you are thinking your material does not have that much stretch use a 3/8" seam allowance.


rearrange your hat, so the seams are now laying on top of eachother and matching up at the top. Sew from one end to the other of the opening on the top, once again tapering your stitches at the folded edges


Take your brim piece and fold in half with right sides out. Press well


unfold and refold so the brim is in half with right sides together and the short edges lined up. Sew along the short edge to form a tube. fold the tube back in half  along your pressed edge so right sides are out again.


Line up the brim with the hat so the folded edge of brim is facing the raw edges of the hat, and side seams are matching.  Slip the brim over the hat and line up all the raw edges( of hat and brim). Pin together


Sew the brim to the hat with a STRETCH stitch (using your serger or zigzag/stretch stitch on your sewing machine)


Done! (wasn't that fast)
 

Now....


 Seriously...what are you waiting for....


~Christine


Wednesday, October 22, 2014

Kids clothes week- Day 1(ish)


So it is not really day #1...but this is the only outfit so far that I can share...(some things are still in the works and others are upcoming patterns)
My oldest needs outfits for school that are comfy, warm, and don't include a certain Disney Ice queen...:)


I made this cute outfit that I think satisfies all , including style (for me) and sparkly (for her)

The floral leggings are made with a Ponte knit from Fabric.com. LOVE this fabric. The patterns is from my All you Need Jammies pattern. I made the leggings without the cuff option.


The sweater is made from a Gold sparkle Hatchi Knit fabric also from Fabric.com. It is really lightweight and soft, with gold thread running throughout. It is really beautiful, although really REALLY messy to sew with (tiny gold flecks EVERYWEAR). It was hard to get a picture that shows how sparkly this is. The pattern is self drafted (possible upcoming pattern...;) )


That's it so far...more coming tomorrow, including a fun FREE pattern...


~Christine
Related Posts Plugin for WordPress, Blogger...